Creating Wood Plank Floors in Playscale For Your 1/6 Diorama or Barbie Doll House
There are lots of ways to create a wood floor in 1:6 scale, but this is a fast and easy way to get a great look on the cheap.
WHAT YOU’LL NEED
Wood grain contact paper: Can be found at any big box store in the kitchen supplies section. I found mine at a thrift store for $1!
Foam core: You want to make sure it’s been stored flat. I choose a dark color so that if my planks weren’t perfectly lined up, it would be less noticeable.
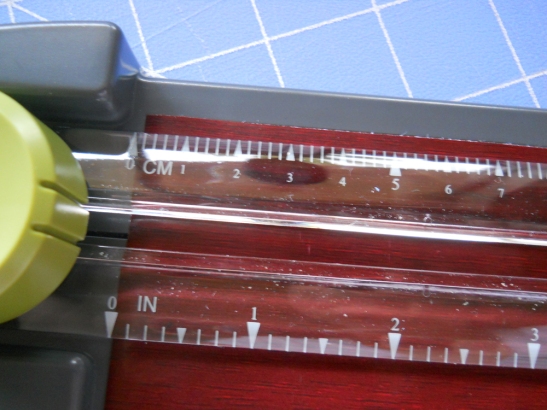
Paper cutter, as pictured: You could also use an Exacto knife and a ruler.
Planning: Decide how large you need your floor to be, and what type of feel you want the room to have. Do you want a rustic, rough-hewn floor? Then you’ll want a contact paper with lots of “knots” in the grain. A more formal wood floor will have more polish, and a finer grain of wood. You’ll also need to think about the width and length of the floor planks you will cut. If you want something more rustic or primitive, then your width will be fairly narrow, and the lengths of the planks will vary at random lengths. A more formal hardwood floor would call for wider planks and less variation in the lengths of the planks.
Here we’ll be doing a more formal look, so I’ve chosen a dark wood contact paper and am cutting my planks at roughly 7/8 of an inch (which will be fairly wide in doll size), and I will use only three lengths; 3 inches, 5 inches and 7 inches.
*Quick Tip: If you’re having trouble seeing something in the photos, click on it, and a larger image will open up.
Begin by cutting large sections of your contact paper in the lengths you want. Make sure you are cutting so that the grain runs horizontally along the length of your paper. Then you will feed the cut section of paper into your cutter, like so:
I am lining my paper up with the guide on the cutter edge, and then just making one swift pass with the cutter to cut the plank.
And viola! My first plank is cut!
Now I’m going to finish feeding and cutting this section through the cutter, and then feed my other sections through, one-by-one, lining up with the guide and cutting. It will only take a few minutes, and I’ll have around 100 planks when I’m done.
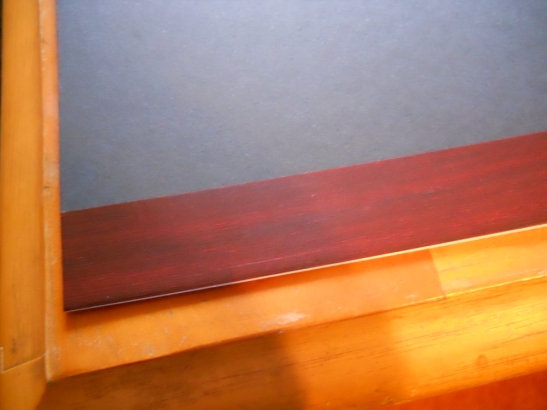
Once my planks are done, I will peel the backing off my first plank and line it up with the edge of the foam board, press and slide my finger all the way across the plank, making sure to press gently and firmly. Then I’m going to repeat this, varying the plank lengths so that they don’t ever line up vertically.
*Quick Tip: Keep your planks in a plastic bin, so they are easily accessible and you can just grab, peel and stick.
If your planks look a little beat up once you’ve got them done, it’s OK! You’ll be covering this floor with rugs and furniture and all sorts of stuff, so don’t stress if it isn’t perfect.
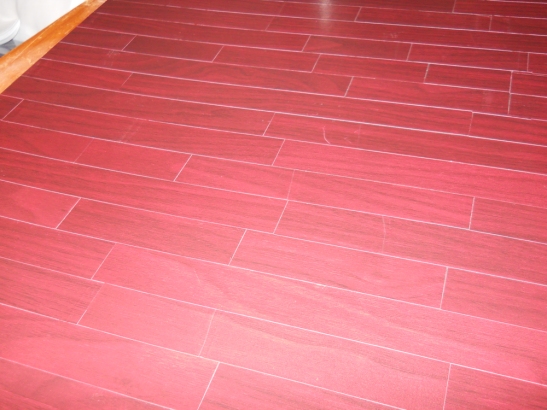
Here are my floors in use in the apartment diorama. Let me know how yours turn out!
Need help or have a question? Let me know in the comments and I’ll do my best to help you out.


Pingback: Lola’s Apartment Takes Top Honors in the Legends By Valkyrie UFO Contest! « etheriadolls
This . ROCKS!
Can I ask, what dimensions you are using (mostly) for creating a doll-room/scene?
This room is 48 inches long by 20 inches wide. It is held together with t-pins, so it can be broken down and stored or reconfigured whenever I need it to be. I am working on an Amelia Thimble bedroom right now, but it is in 1:6 scale, so it could also function as a room for an 11 to 12 inch doll. Photos of that will be coming soon!
oh wow, that seems huge! Can’t wait to see the bedroom! ^_^
Pingback: Create a Travel Tote for Amelia Thimble « etheriadolls
Pingback: Make Amelia Thimble’s Pigtail Wig into a Cute Flipped Bob « etheriadolls